2.2.3 Deploy the Database
Now that we have seen the basics of how the YAML files are written, let’s start building out the db.yaml file.
- In the section2 folder in the IDE you will find a blank db.yaml file. We will be working with that file in this section.
The following code is a good starting point for our Postgres database. You’ll notice that we added another label and some other keys. Copy the YAML below and paste it into the empty db.yaml file in the IDE.
apiVersion: apps/v1
kind: Deployment
metadata:
  labels:
    service: db
    app: ecommerce
  name: db
spec:
  replicas: 1
  selector:
    matchLabels:
      service: db
      app: ecommerce
  template:
    metadata:
      labels:
        service: db
        app: ecommerce
    spec:
      containers:
      - image: postgres:11-alpine
        name: postgres
        securityContext:
          privileged: true
        ports:
          - containerPort: 5432
        env:
        - name: POSTGRES_PASSWORD
          value: "password"
        - name: POSTGRES_USER
          value: "user"
        - name: PGDATA
          value: "/var/lib/postgresql/data/mydata"
        resources: {}
        volumeMounts:
        - mountPath: /var/lib/postgresql/data
          name: postgresdb
      volumes:
      - name: postgresdb
---
apiVersion: v1
kind: Service
metadata:
  creationTimestamp: null
  labels:
    app: ecommerce
    service: db
  name: db
spec:
  ports:
  - port: 5432
    protocol: TCP
    targetPort: 5432
  selector:
    app: ecommerce
    service: db
status:
  loadBalancer: {}
Take a moment to review the file. Do you remember what most of these keys mean?
You can apply this configuration by running
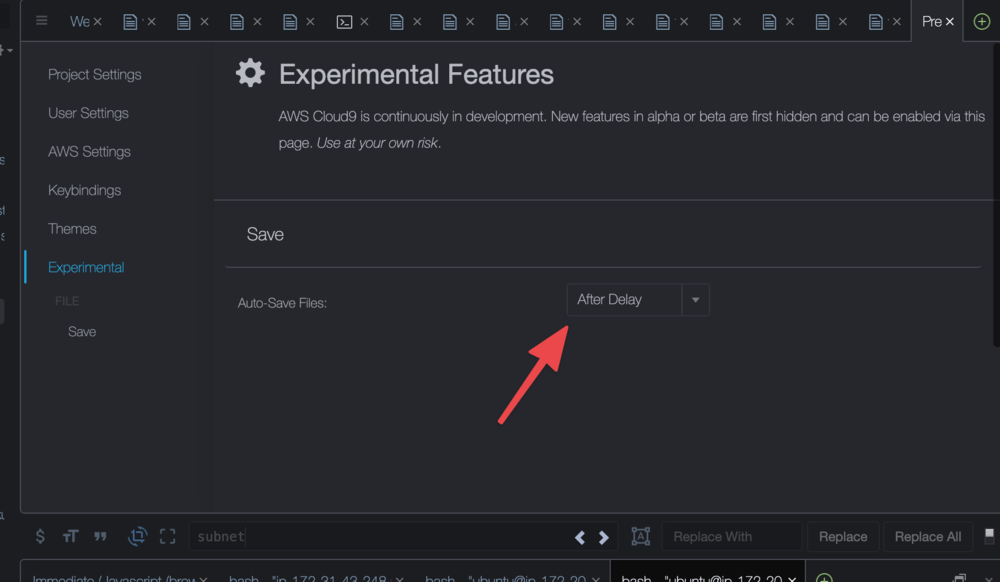
kubectl apply -f db.yamlfrom the section2 directory. If you get an error like No objects to apply, you haven’t saved the file yet. If you get an error like the path db.yaml does not exist you are not in the correct directory. Make sure you are in the ~/environment/section2 directory when you run the apply command. Note: if anything in this file or any of the other yaml files in this scenario are new to you, then visit https://kubernetes.io/docs/home/ and search for the keyword that is not clear.If you know you are going to have a problem remembering to save files, open the Cloud9 Preferences by clicking the gear icon at the top right. Scroll down to Experimental on the left side of the Preferences window. And then set Auto-Save to After Delay. You can now close the Preferences window.
As you start to work with kubernetes, typing kubectl every time gets a bit tiresome. When you ran the setup script, an alias for kubectl was create like this:
alias k=kubectl. This is a pretty common alias on a lot of systems. So try runningk apply -f db.yaml. Another alias was created setting kubectl -n kube-system to ks making it easier to do anything with that namespace.There are still some things we should do like create a persistent volume and not specify the password here, but this will work for our first pass.
Run
k get podsto ensure the database pod has started.
In the next step, we will take a look at deploying one of the components of the actual web app.